- Manually enter SN, IP, and destination directory
- Import settings from an export file you have saved on your disk
- Import settings from an export file on your receiver
- Import settings from an export file backed up on the Ambassador FTP site
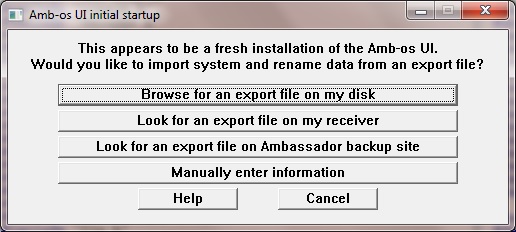
When the user interface (UI) is run the first time, it will need to know the serial number (SN) and IP address of your receiver, and a destination directory for transfering the audio files into. If this is a re-install on a new computer, you would probably like to recover your renames, timed transfers, and all the other settings you have entered into the UI.
To that end, you will be given the following choices.
If this is the first time you have used the Amb-os UI (user interface),
you will use the manual entry option.
If you have used the UI previously at your site, we offer three ways to
hopefully recover the settings you have already entered into that UI.
| |
The browse option lets you browse your local drive for an export.txt file you have saved from a previous UI.
| The manual entry option lets you enter enough information to get the UI and the receiver talking to each other. The IP address should be static, ie not assigned by DHCP, so it will remain the same after your router gets power-cycled. The destination directory can be a network drive. It can also be changed later, so don't worry too much about it at this point. | 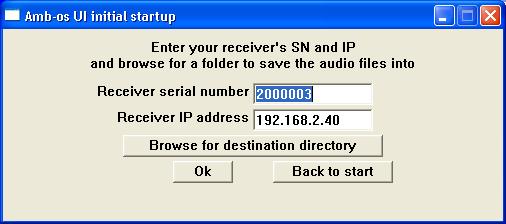 |
| If you have used a UI on your current AMR-100 receiver, it will likely have an export.txt file saved for you. You can look for it by selecting the second choice and filling in the receiver's serial number and ip address. | 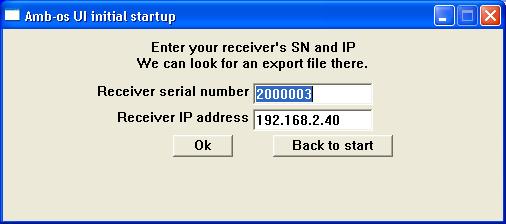 |
| If you have used a UI previously, it will probably have backed up its settings to the Ambassador FTP site. You can search that site by providing the serial number of the receiver you used previously. If for some reason you have a new receiver with a new serial number, you should enter the old serial number here to search for the settings that were saved under the old serial number. You can change it to your new serial number later on just before you import the settings. | 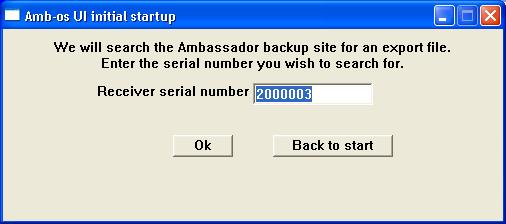 |
| If you search the Ambassador ftp site, you will see all the computers that have run the UI while connected to the serial number you searched for. You can then select an export file to view... | 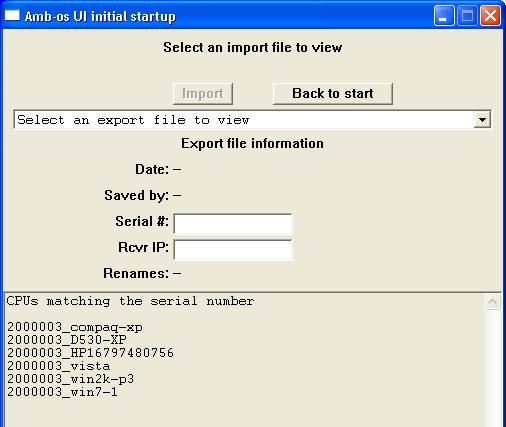 |
| Here is an example of the export files you can choose from after searching the Ambassador ftp site for a backup export file. It shows the date of the backup, the size of the file, and the computer the UI was running on. Select one export file. | 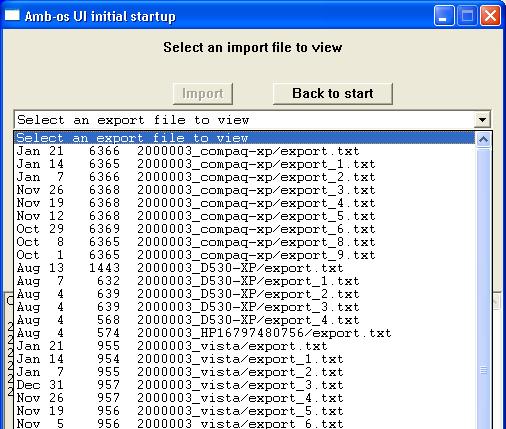 |
|
After you select an export file (from the Ambassador ftp list, or load one from your
local drive, or from your receiver),
the renames and transfer times from that file will be shown.
Make sure the serial number and IP address match your current receiver.
You can tweak the rest of the settings later on.
If you've searched the ftp site, you can select other files to view until you
find the one you want. If you've browsed for a file on your local disk, you can
go Back to start and look for another file.
When you find the one you want, or closest to what you want, hit the Import button and the UI will start up. if you had Misc transfers enabled, it will be disabled, in case you need to tweak some things before re-enabling it. And if the temp or destination directories are not valid, you will be asked for a new one. | 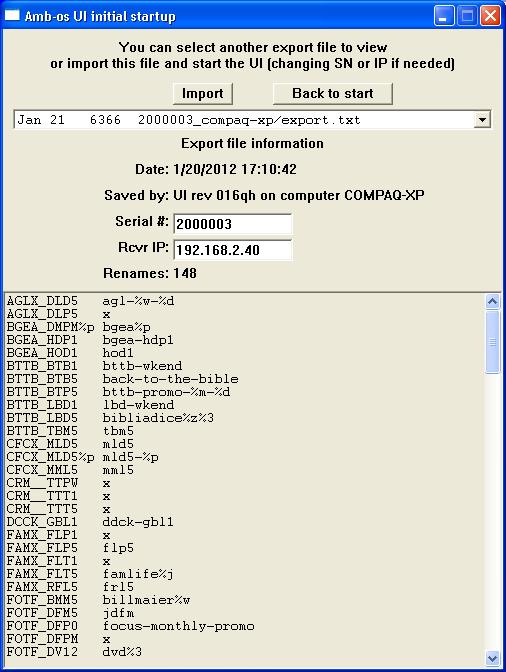 |
Again, you will want to give your receiver a static IP address if at all possible. Most routers like to assign IP addresses automatically with DHCP (dynamic IP address), but that will cause your receiver to get a new IP address after each power hit, so the UI will lose contact with it.